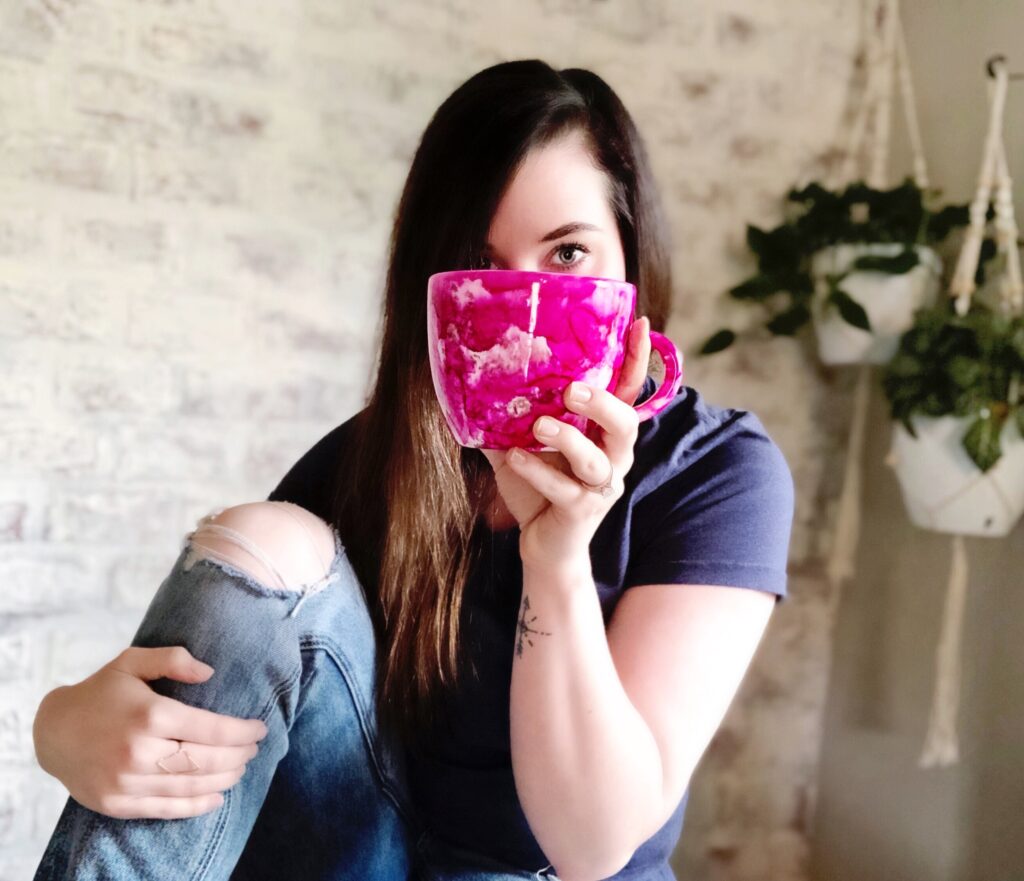
I don’t know about you, but I’m a sucker for a beautiful mug. It drives my husband cRaZy! When we first moved in together, it didn’t take long for him to catch on to my mug addiction. So he laid down some fully warranted ground rules. For every mug I bring in the house, one has to leave. So sad, but it only means I’ve gotten pickier when it comes to my mug standards! I’ve been LOVING the marbled trend. Fully inspired by Pintrest, I really wanted to create a beautiful marbled mug. One problem though! Every marbled mug tutorial I stumbled upon was not dishwasher safe. Ummm, who wants to hand wash dishes?! Am I right?!
I did come across one tutorial that promised a dishwasher safe seal using a dishwasher safe product made by Mod Podge. In reading thoroughly though, there seemed to be issues with the curing time as well as longevity of the product. Hey, I’m a Mod Podge fan, but I need longevity folks.
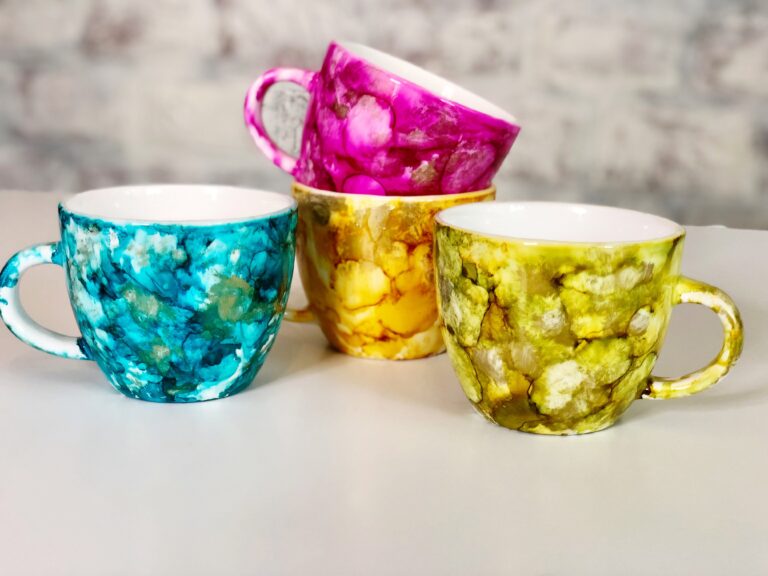
That’s when I decided to give resin a shot. From what I could tell, it had not been tried. I’ve worked with resin many times before and know just how tricky it can be. So I knew I was taking a risk. But I also knew how rock solid it is, and felt this was my best chance at a truly dishwasher safe mug. But there’s a catch, you can’t just use any resin. After much research, I was only able to find ONE option that claimed to be food safe. In the end, my results were stunning. Aesthetically, I got exactly what I wanted. Vivid colors with a glossy finish. So here’s how I did it!
Confessions: I have some recommendations of things to look out for during your process and ways to ensure an even better result than mine. Read through to my tips about how to increase durability.
**This post may contain affiliate links. I may receive a small commission if items are purchased from these links.**
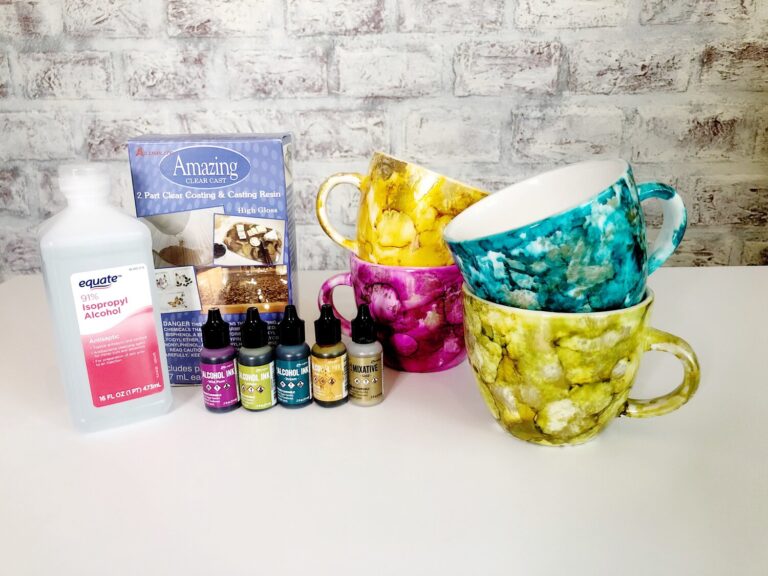
MATERIALS:
Amazing Clear Cast Resin – Amazon does not currently have affordable options for this. This should be carried at any craft store as well as Walmart.
Alcohol Ink – I used Tim Holz brand. Can be purchased from any craft store, but here are a couple Amazon options featuring the specific colors I used.
White mug – Mine came from Target back when this project was created. It’s no longer available so here is a similar option.
Gloves
Straws
Popsicle stick or something to mix resin with
Rubbing Alcohol (91%)
A surface to get messy on
Fluffy Paintbrush
Something tall to fit inside your mug, turned upside down, while drying – I Used Cardboard Rolls
Disposable cup for mixing resin
Paper towels

Let’s Get Started!
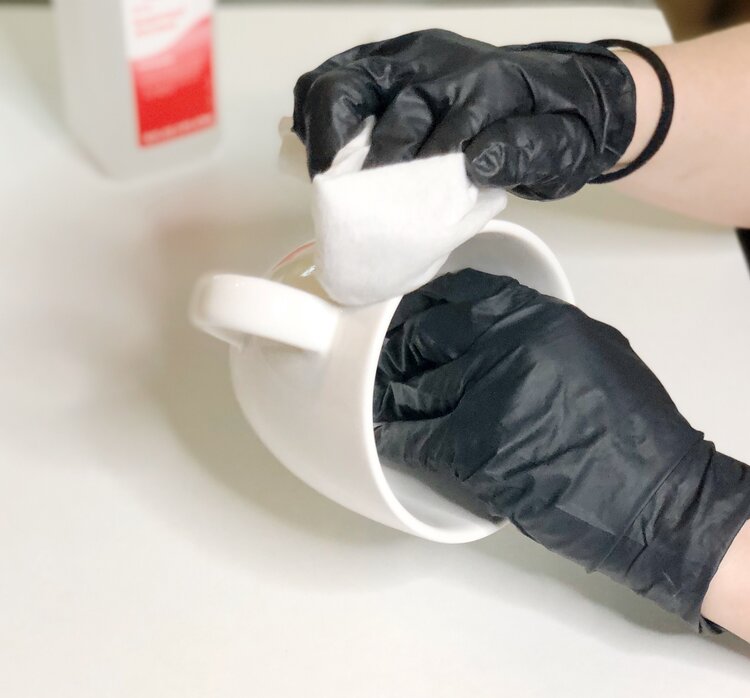
STEP 1:
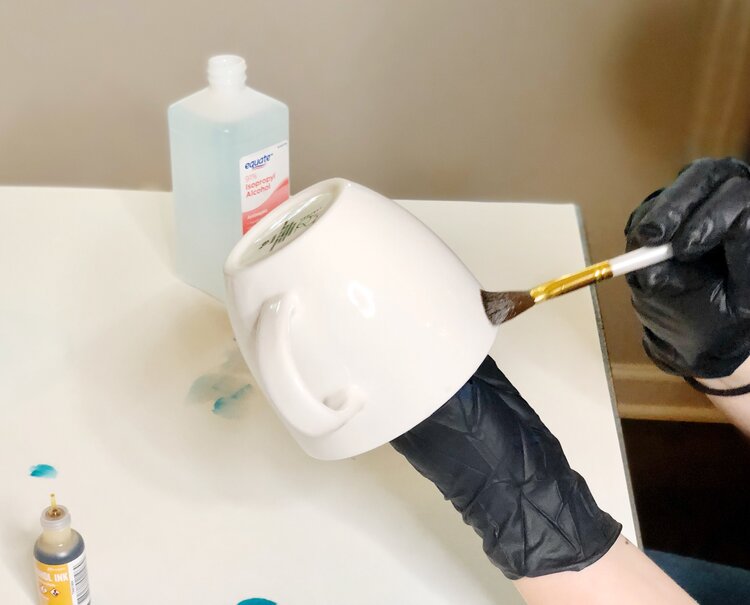
Clean your mug(s) with rubbing alcohol and a paper towel
STEP 2:
Use your fluffy paintbrush to apply a generous coat of rubbing alcohol to the outside of your mug.
*Tip – Hold your mug throughout the entire alcohol and alcohol ink applications from the inside of the mug as shown in the photo.
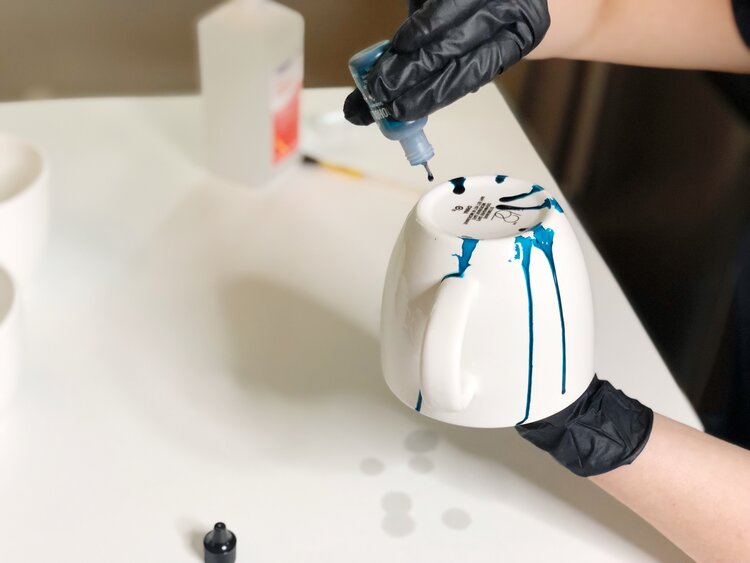
STEP 3:
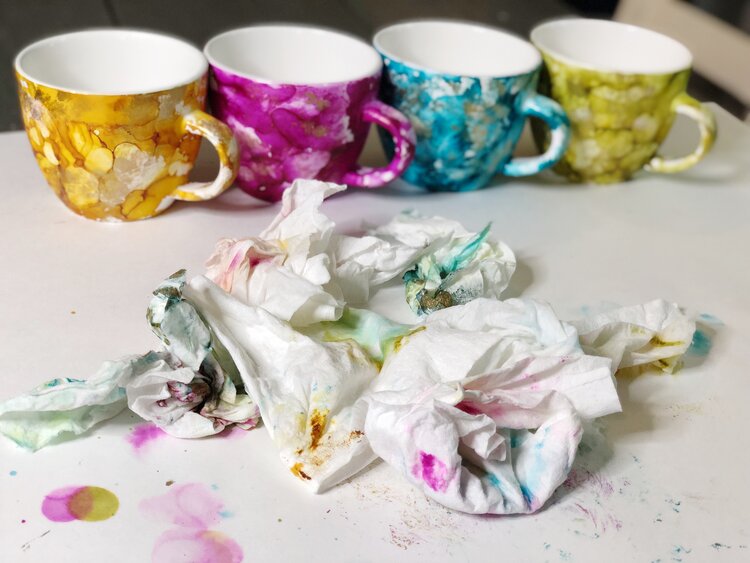
Drip Alcohol inks at the base of the mug, Allow the ink to run down. I started with this approach, then also turned the mug horizontally and added some sideways drips as well.
*Tip – The ink dries FAST, so loop steps 3 & 4 together. Drip, blow, drip, blow; until you’ve achieved the result you are looking for. Don’t like how it looks? At this stage it will wipe right off with more rubbing alcohol. So use this opportunity to clean up any weird spots you don’t like. Or start over entirely.
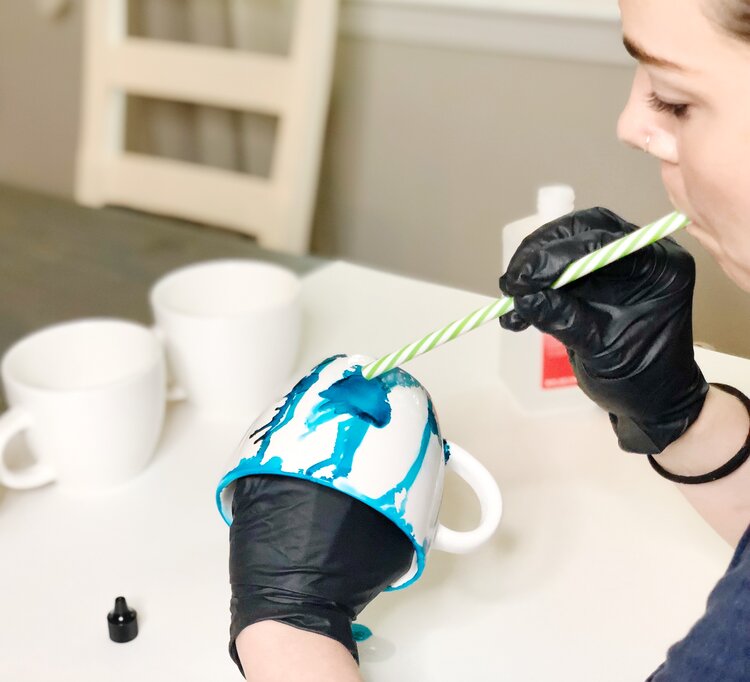
STEP 4:
Drip and blow. I alternated the blowing with a straw that would localize the air, as well as blowing without a straw to get a little more power and coverage. Try both.
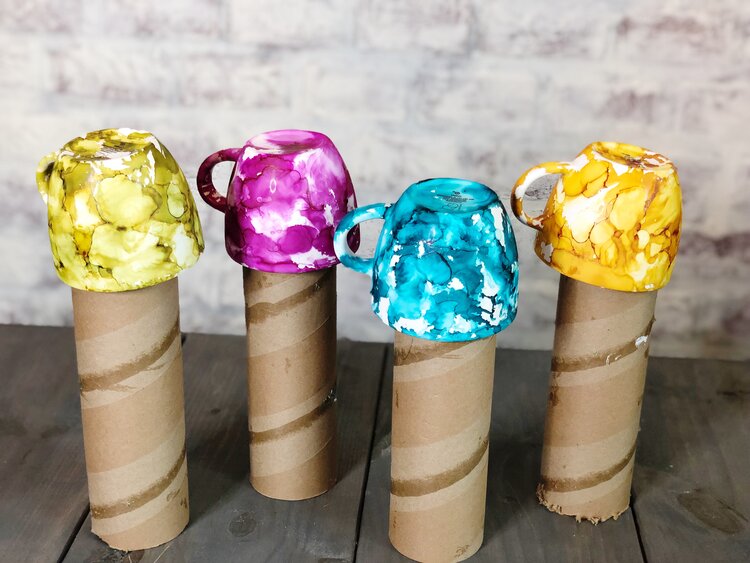
STEP 5:
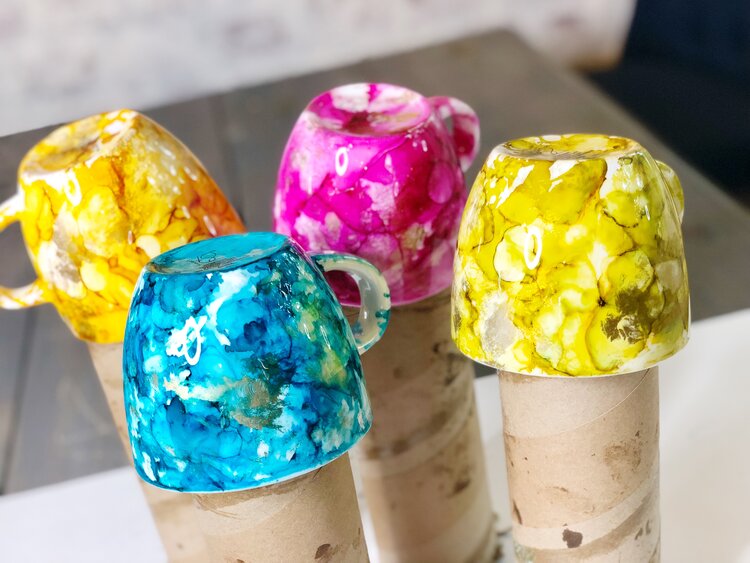
After you’ve done all the dripping and blowing necessary to achieve the result you are looking for, allow your mug(s) to thoroughly dry. I used these cardboard tubes I had handy from the center of bubble wrap rolls.
STEP 6 (OPTIONAL):
After everything seemed to be dry to the touch, I decided to add in some metallic accent. This is also an alcohol ink by Tim Holz, but the consistency of it was a bit different. Dripping and blowing was not effective, so I dabbed a little bit onto a paper towel and just lightly applied it randomly on top of the color. – After you’ve finished this, let it dry again.

STEP 7:
After everything was dry to the touch, I flipped the mugs over to clean out any alcohol ink that made it inside the mug. Using the rubbing alcohol on a paper towel, wipe inside and on top of the lip.
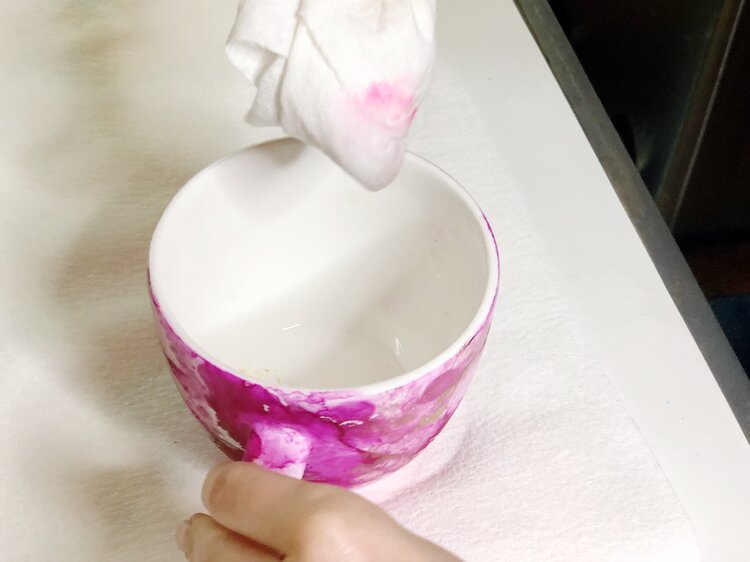
Yup! It’s messy. Make sure you are on a surface you aren’t concerned about getting ruined. This is all the ink I removed from the inside and lips of my mugs
STEP 8:
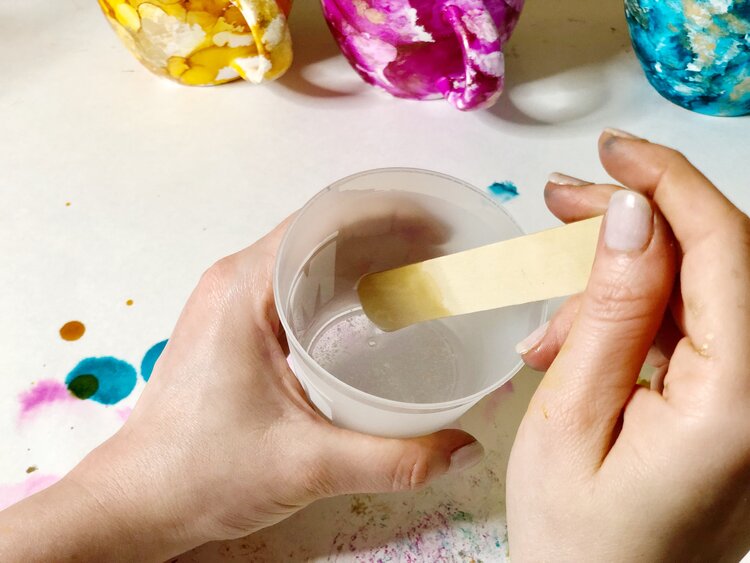
Now here’s where the resin comes in. First off, not sure why I’m not wearing gloves right here. But you should probably go ahead and put those on 🙂
Mix resin according to box instructions. It comes with mini cups for measuring. I did one cup of each and had exactly enough for all 4 mugs.
STEP 9:
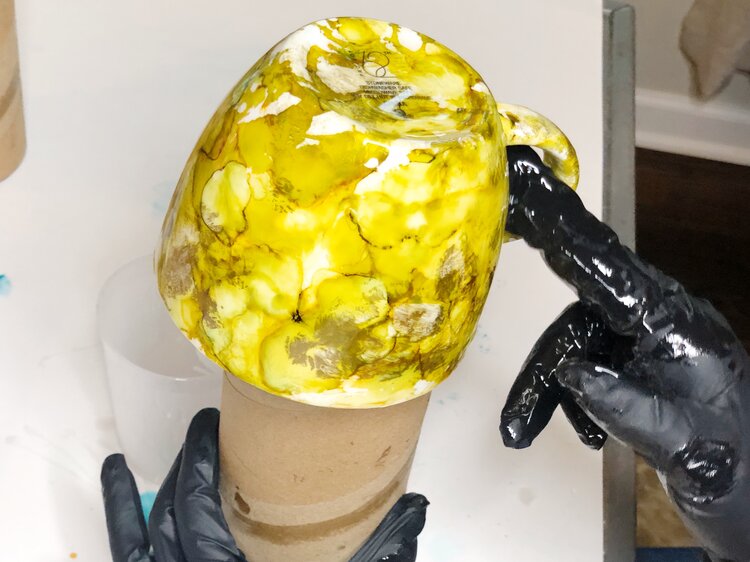
Apply Resin by scooping it, then rubbing it onto the outside of the mug, using your fingers. It’s thick so you can tell pretty well where you are putting it. I used my cardboard rolls to hold the mug. This gave me both hands to manipulate the mug, while applying the resin.
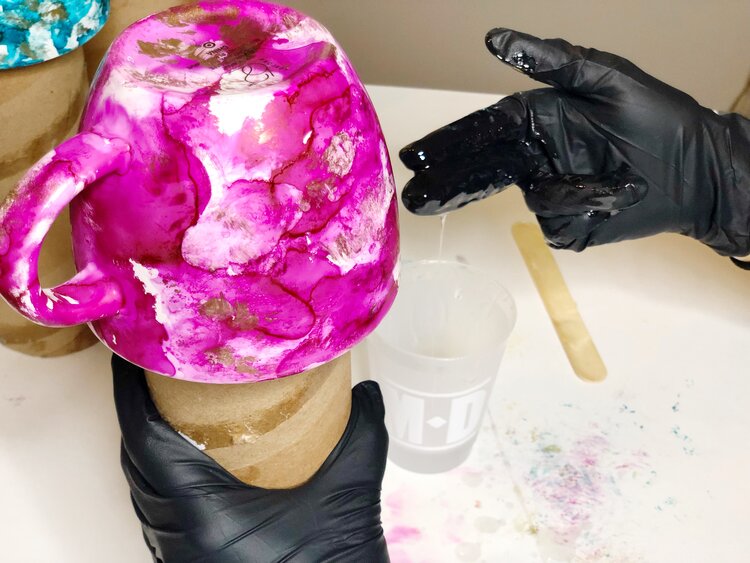
*Tip – Make sure you get inside and all around the handle well coated
STEP 10:
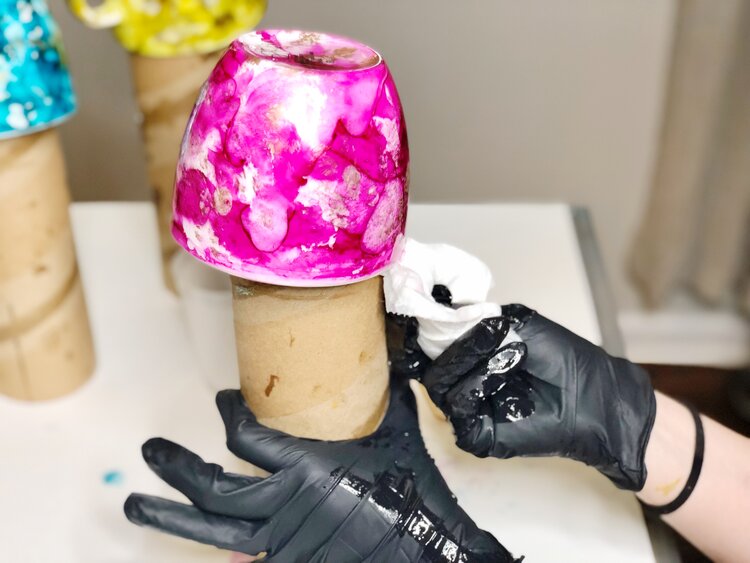
Once you feel everything is well coated leave mug(s) upside down to begin the curing process.
*Tip – I spent the first half hour or so, and rotating from mug to mug, wiping thick spots and drips of resin that worked it’s way down to the lip. Once I felt it finally stopped dripping, I left it over night to finish curing.
ALL DONE! Let it Cure!!
CONFESSION TIME:
This is the point in which I would like to confess my shortcomings 🙂 – With every new craft comes growth and learning. Now, I’d like to pass on some tips that I learned, during and post project, to help you create a better version of these mugs than I did.
1. A trick I didn’t know when I created this project regarding air bubbles in resin: Use a heat gun or blow dryer on high heat to remove air bubbles. Blow heat onto the mugs after you are finished applying the resin. The heat will remove/reduce air bubbles inside the uncured resin.
2. If after curing, you still feel tiny air bubbles or spots were you missed the resin entirely, here is my recommendation:
In order to increase durability, I recommend doing a second coat of resin with some light fine grit sanding in between coats. These mugs held up well in the dishwasher on normal cycle for about 2 months. After that, the resin began lifting in some spots. I believe the reason for that was the abundance of tiny bubbles I had in my resin. Those bubbles, inevitably left voids in the seal of the resin. After your mug(s) are finished curing, you will be able to feel any tiny air bubbles or spots you accidentally missed with the resin. I felt them and I WISH, at this point that I had used a fine grit sanding block to rough up the surface just a tad, wiped clean, then reapplied a second thin coat of resin. If you feel these tiny air bubbles I’m referencing, but don’t want to go through the process of another coat, I recommend you stick to hand washing, or using a gently dish washing cycle on the top rack (if your dishwasher has that option)