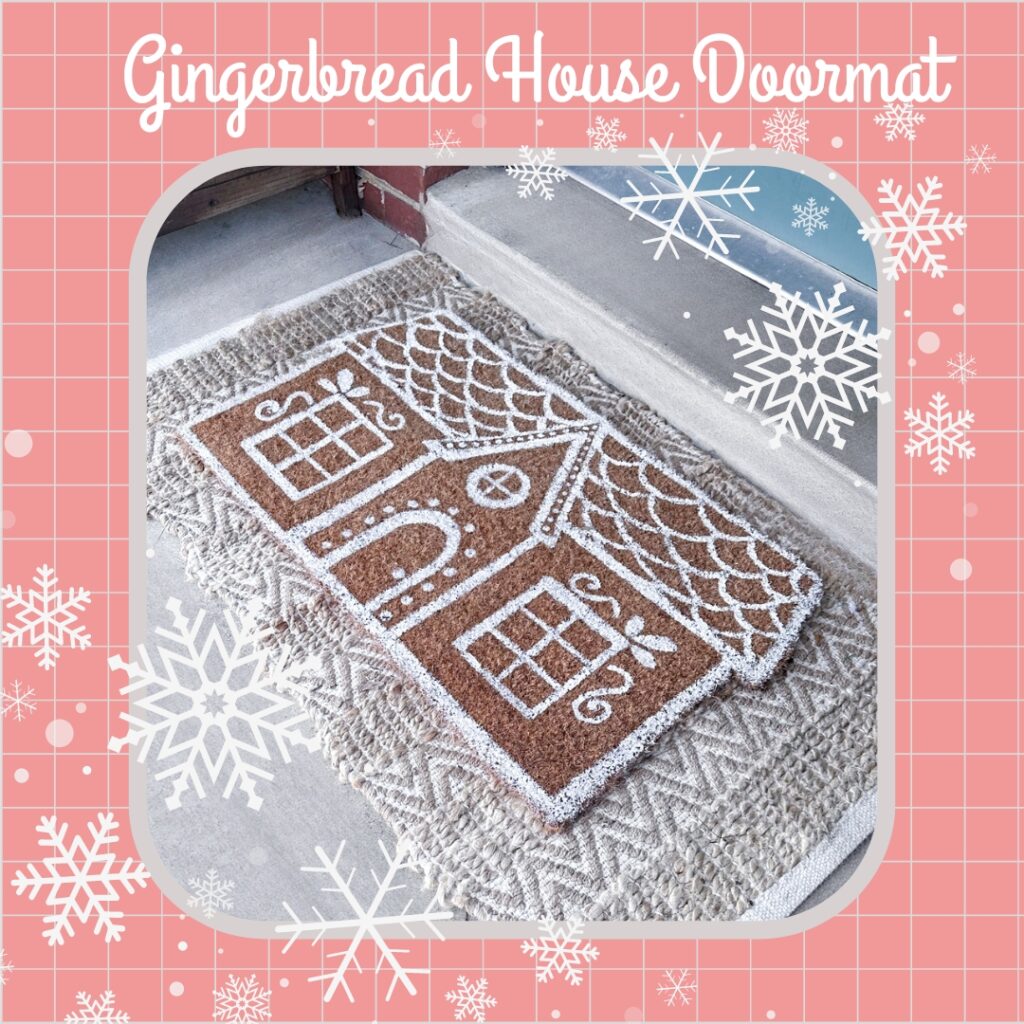
DIY Gingerbread House Doormat W/ Free Stencil File
Ohh it’s that time of year! Time to dig all those Christmas decorations out of the attic. Go through each thing one by one. Then immediately decide you need to head to the store and buy some more. No? Just me?! I’ve recently stumbled upon a few posts creating these stunning Anthropologie inspired gingerbread mats, and I was instantly obsessed. There was only one problem… They all seem to be free handed. I’m not going to say I CAN’T paint free hand, but honestly I just don’t trust myself with it. There are many free hand painted projects that are more forgiving, or can be fixed with more paint and touch ups, but a door mat? I don’t think so!
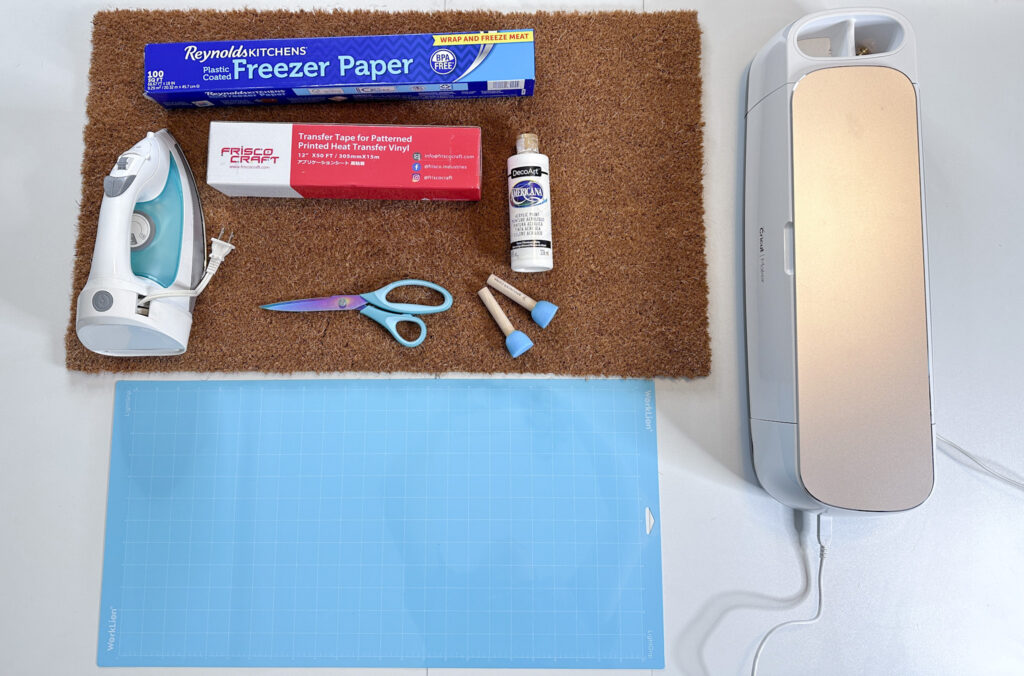
Of ALL the things I’ve made. I’ve actually never DIY’d a doormat before! I knew there were a few routes you can take for creating stenciled doormats, but I decided to go with the freezer paper option. It’s affordable and a larger surface area to cut from. I do think maybe next time, I’ll try another option though.
The Details:
I’ve included my gingerbread drawing as both a 4 piece PNG stencil and a PDF image that you can print and cut by hand yourself if desired.
For this tutorial, I’ve created my mat using my Cricut Maker machine, but I think any cutting machine will do.
** This post contains affilliate links. Purchasing from any of my links may earn me a few pennies at no additional cost to you
A couple quick notes before we dive in. 1st, fair warning here, this project is a bit more time consuming than it seems. Between getting the freezer paper to adhere, and the actual painting, this took a bit longer than I expected. It’s a simple process, but it requires some patience. If you think you could freehand it and bypass the stencil, it would definitely be a time saver.
Also, be sure you watch my video to get a look at the technique I found helpful in getting the transfer tape to drop the freezer paper in place.
STEP 1:
First be sure you’ve got your PNG files loaded into your cutting sofware. You are going to need to take a moment to line up those 4 pieces perfectly, then adjust the overall dimensions of the completed image to fit within the dimensions your door mat. You want it to be just a tiny bit smaller than your actual mat, since we will be cutting out the final result.
Most of these plain doormats are 18X20 as mine is, but just make sure and adjust your file accordingly. Once we’ve got the software part ready to go, let’s make our stencil pieces.
STEP 2:
Place your freezer paper waxy side down onto your sticky mat, be sure to adjust your machine settings to the freezer paper option. Once each piece is finished cutting you’ll weed everything out.
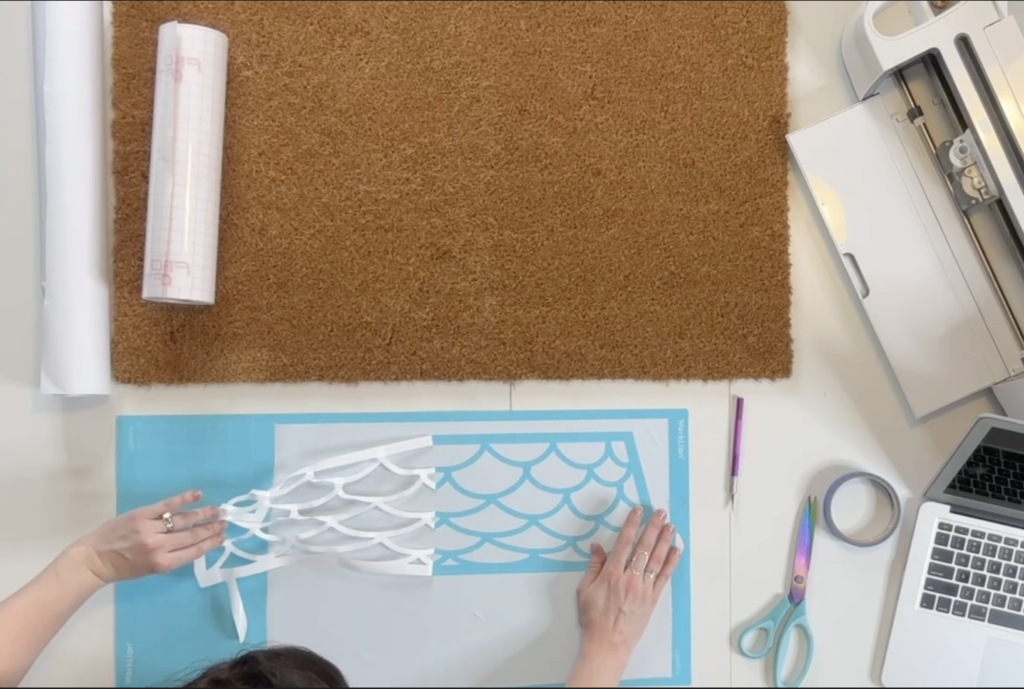
Remember, this is a STENCIL, so you are weeding opposite what you normally would.
After weeding, apply your transfer tape to the top of your stencil and remove from the mat by peeling the mat away from the stencil. NOT the stencil away from the mat.
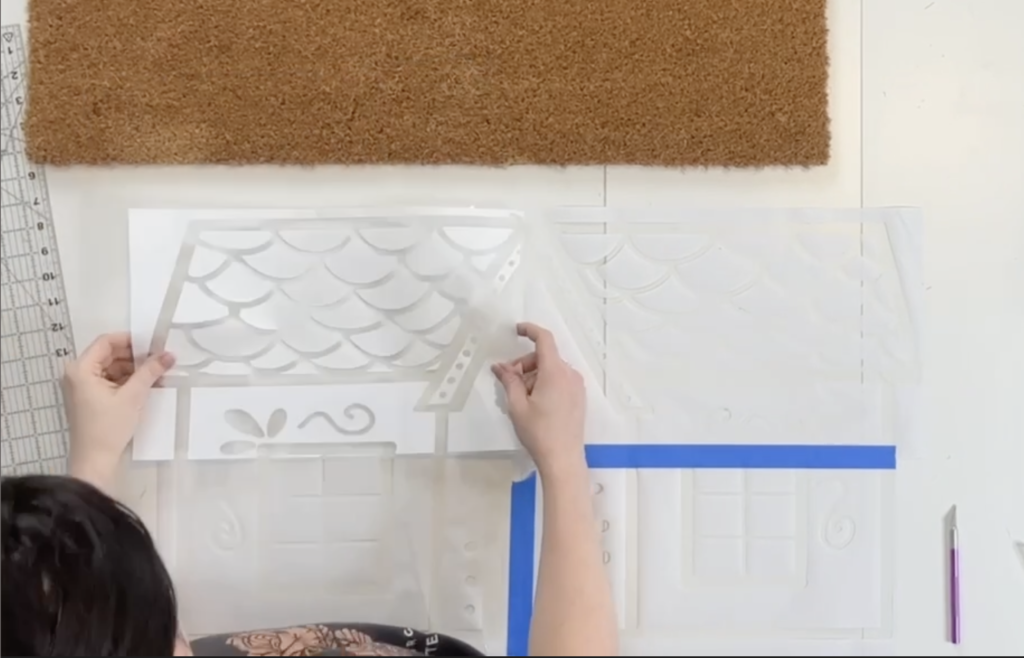
STEP 3:
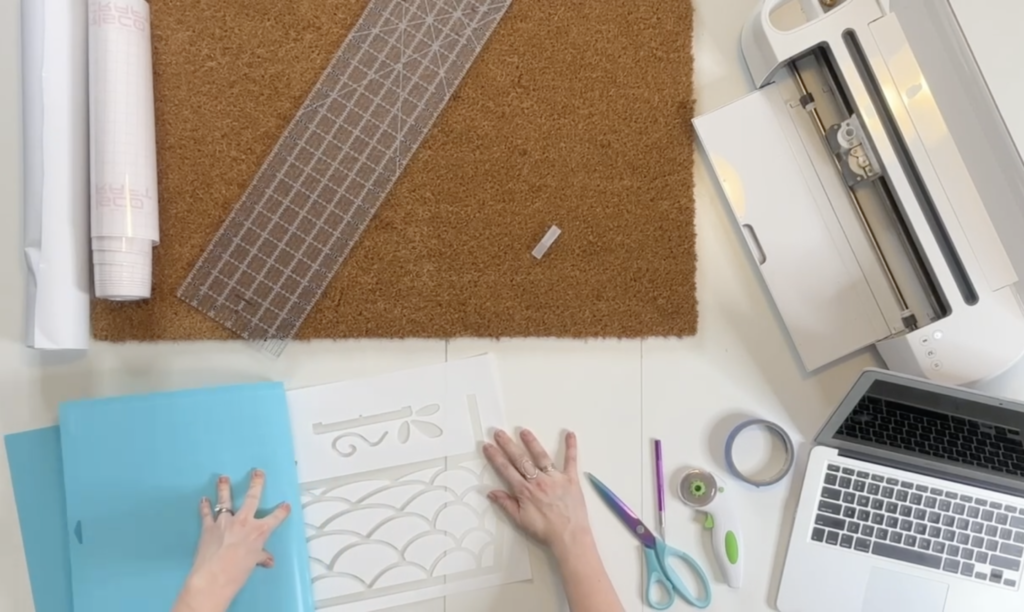
Now that we have each piece of our stencil completed, line up the seams of the pieces and attach with painter’s tape to create one large stencil. I did this by flipping it over and sticking it right to my table.
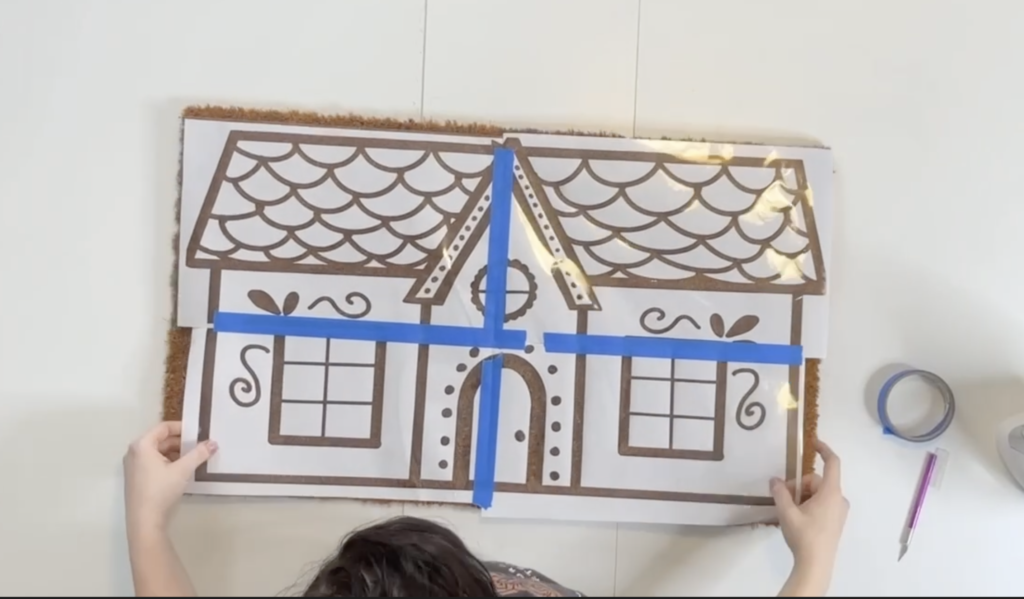
STEP 4:
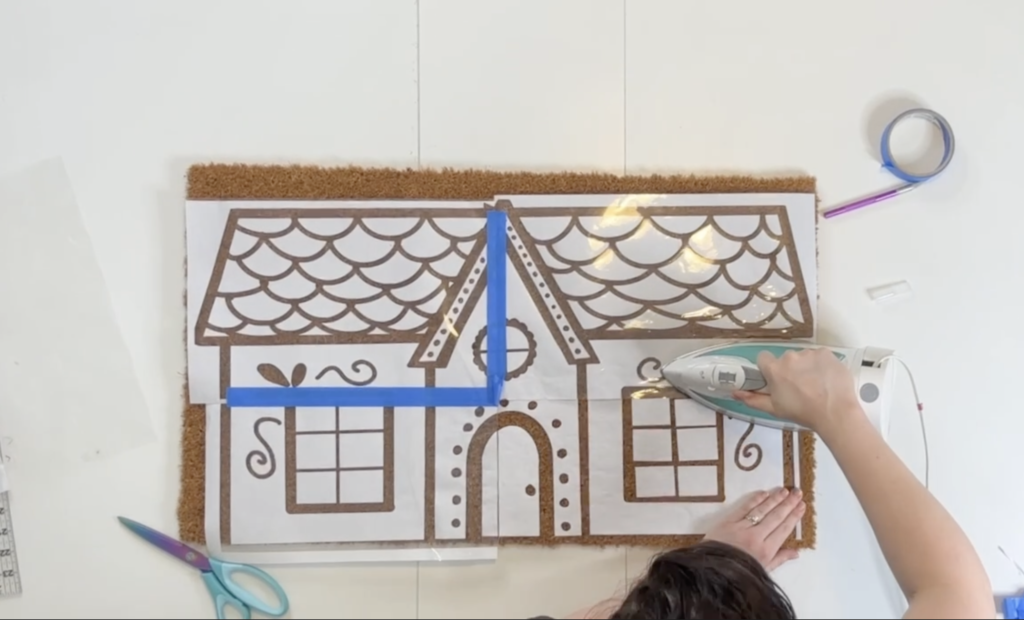
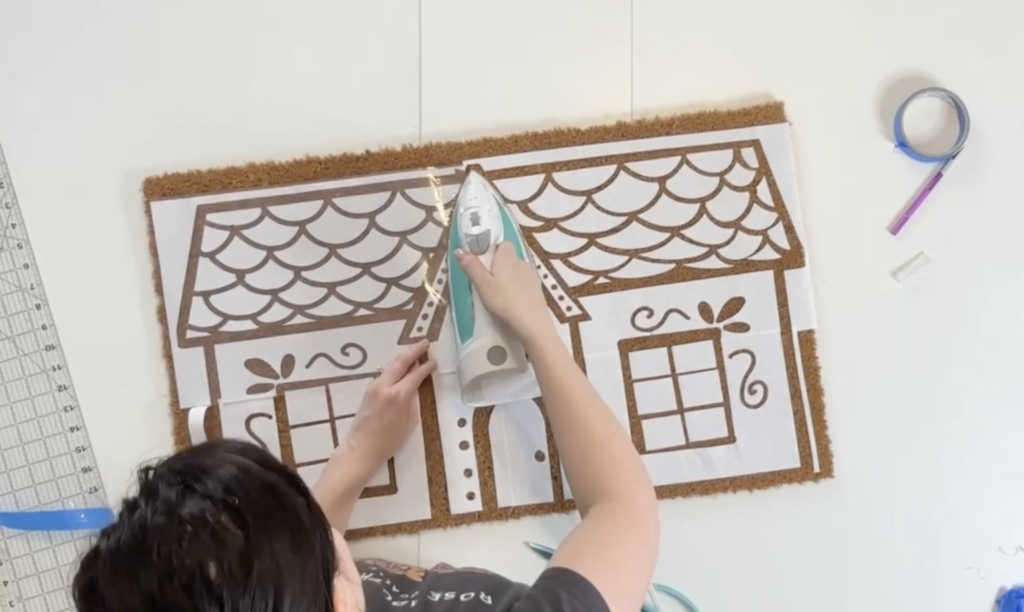
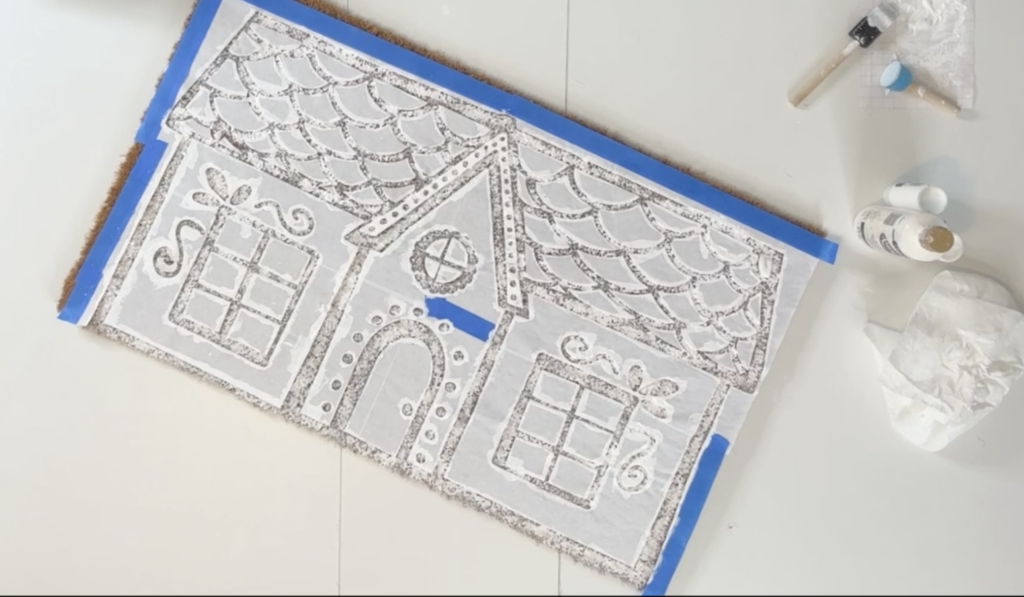
Lay your stencil on top of your mat, making sure all edges are properly placed. Using your dry iron on the hottest setting, begin ironing your stencil down in small sections at a time.
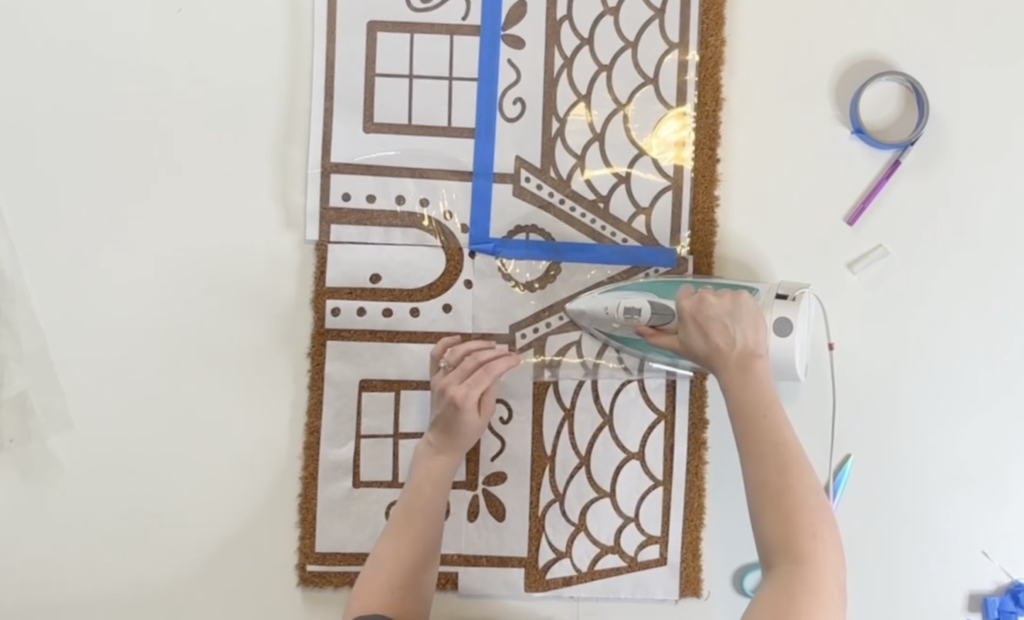
Getting that freezer paper to adhere is not the easiest task. I found it easiest to peel up the transfer tape while it was still hot. This allows it to release the freezer paper a little easier. Cut off sections of the transfer tape as you move along and come back and re iron down all those freezer paper pieces into place.
This REALLY takes some patience and quite a bit of adjusting and re ironing as you go along. We just need the freezer paper to be held in place, it’s not going to be a super strong grip.
STEP 5:
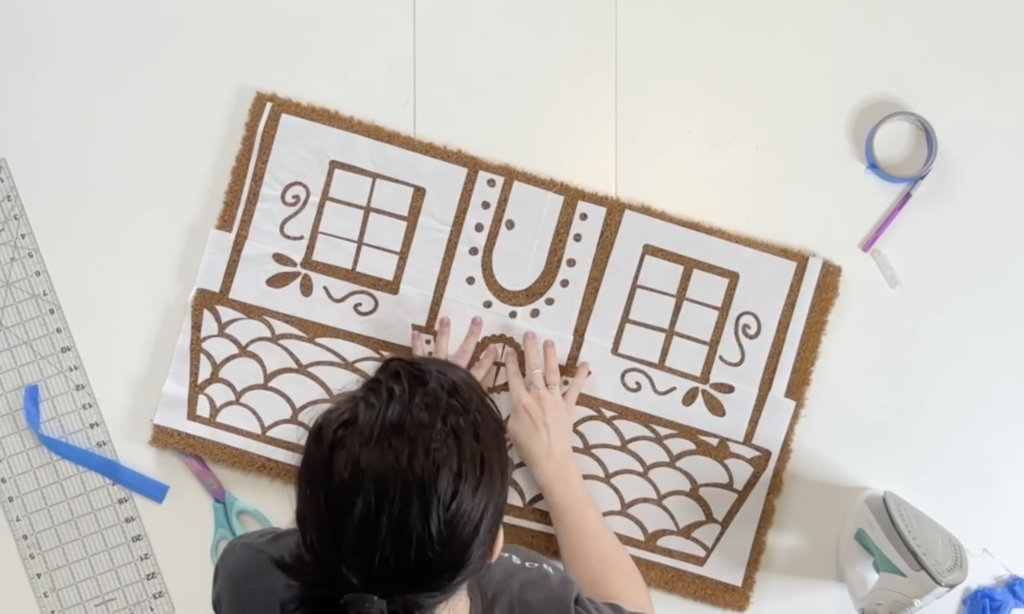
Once your freezer paper is all sufficiently held in place, go ahead and tape any exposed areas around the edges, and reinforce any seams you feel necessary with the painter’s tape.
STEP 6:
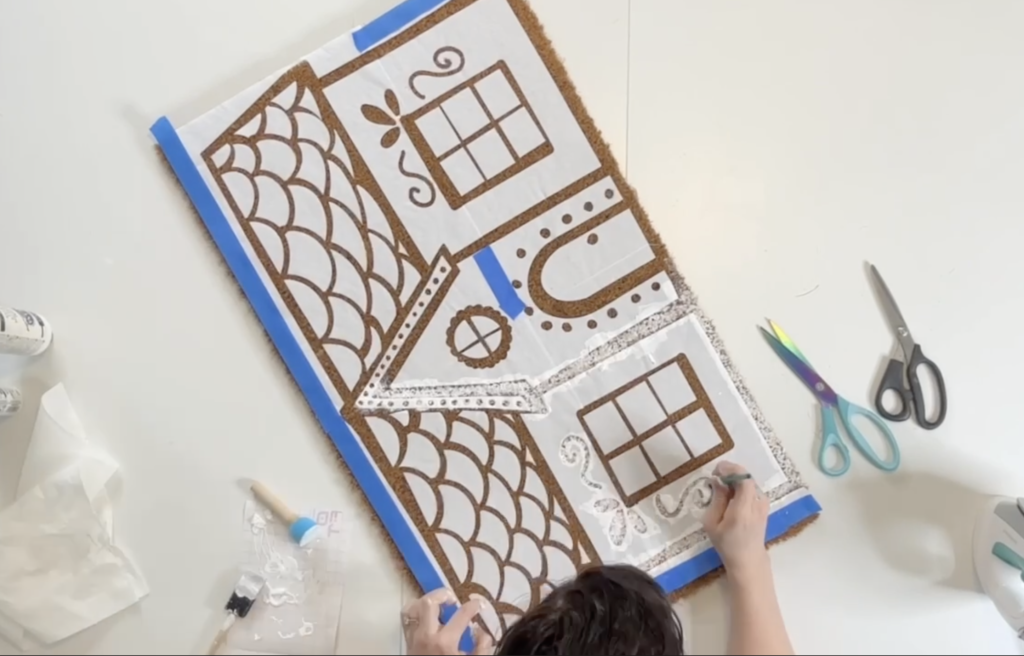
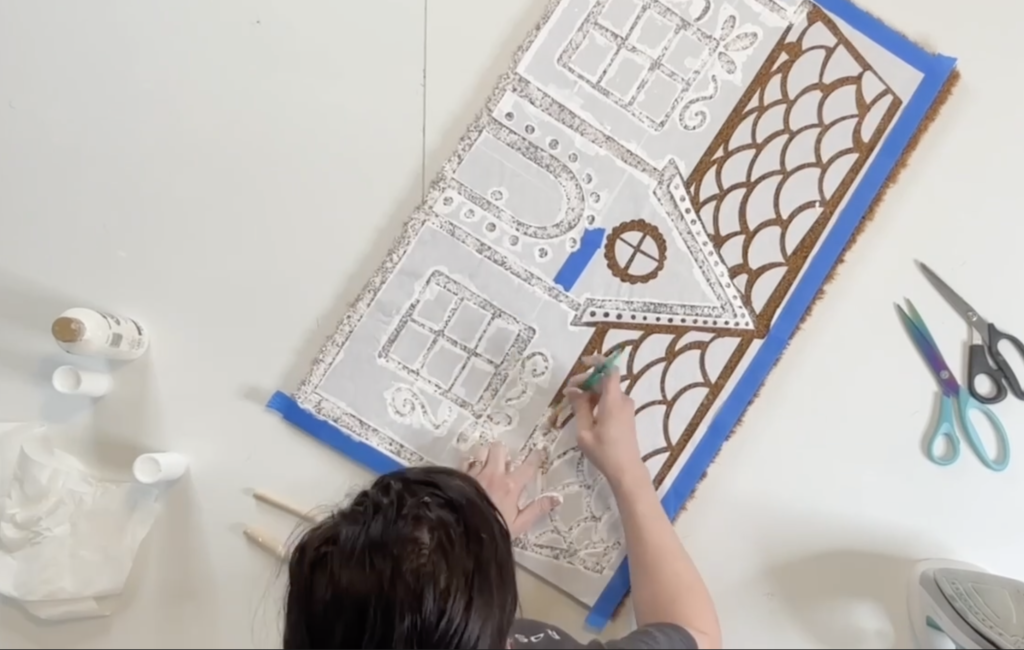
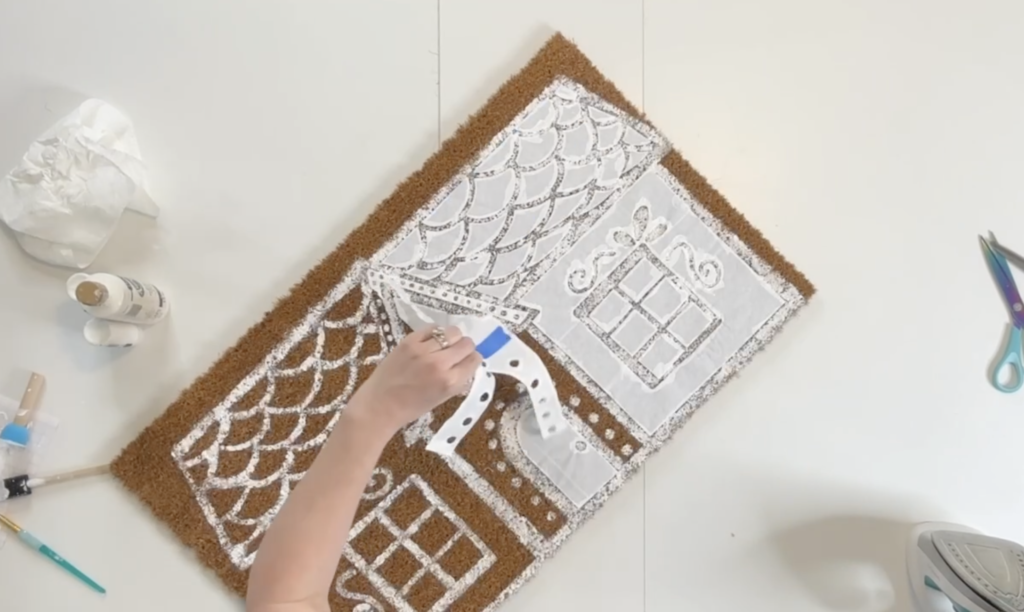
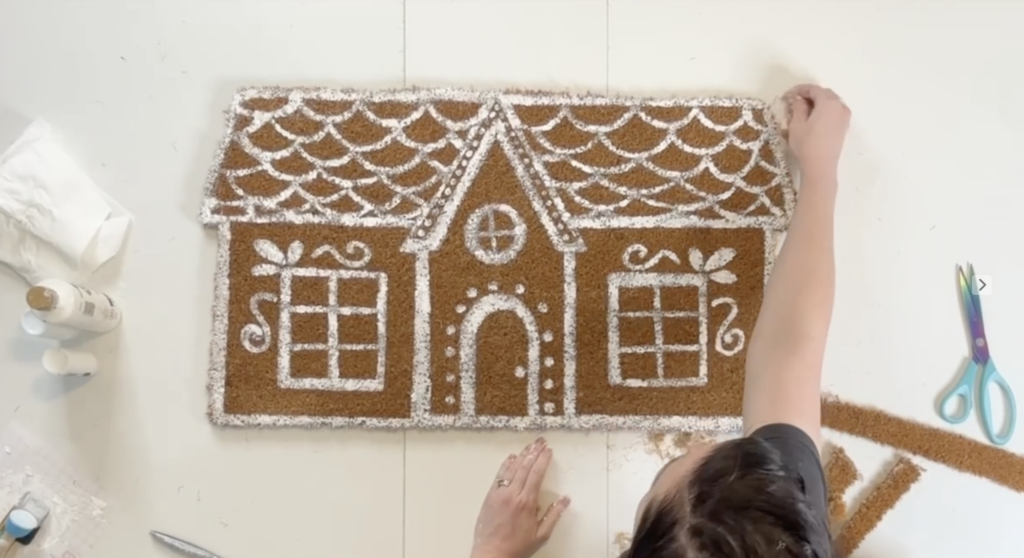
Begin painting. Being careful as you move along and work your way around smaller more fragile pieces of the stencil. Press and hold the stencil in place with one hand while you paint around the edges with the other.
I did experiment with a couple different brush types here. I initially thought a sponge brush would be ideal, but I actually ended up liking just a basic little paint brush instead. This takes A LOT of paint. The mat really soaks it up. This is why I found the painting process to take so long. Because I was just caking the paint on to get it to show up as bold as I could. So make sure you’ve got plenty of paint on hand before starting.
STEP 7:
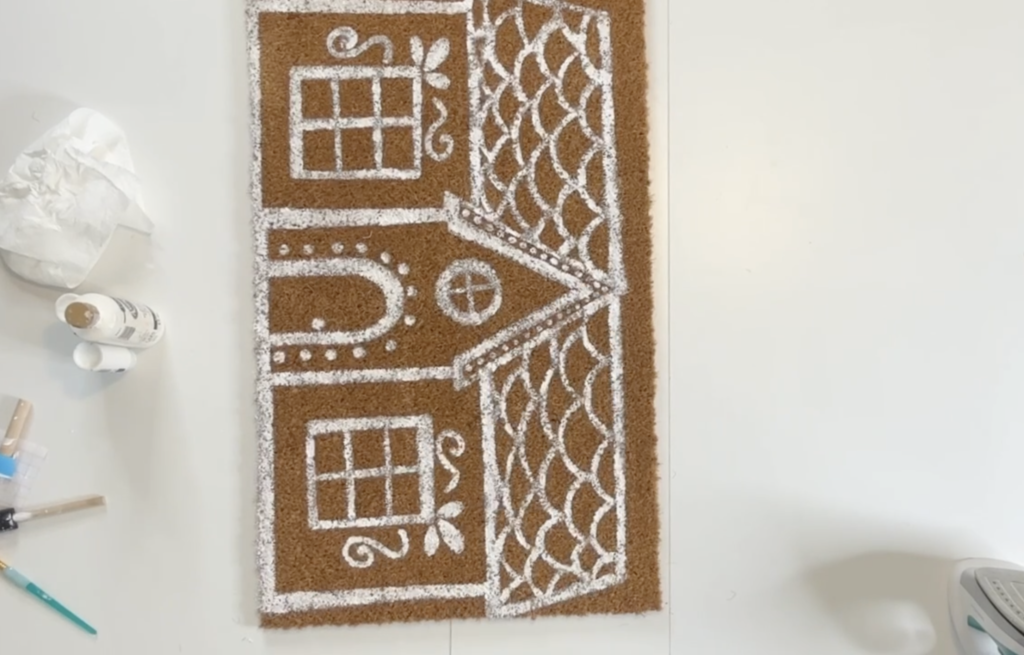
Once you are finished painting, you can go ahead and carefully peel up your stencil. Or you can wait until it’s fully dry. I’m impatient and immediately peeled it up so I could reveal the finished result!
STEP 8:
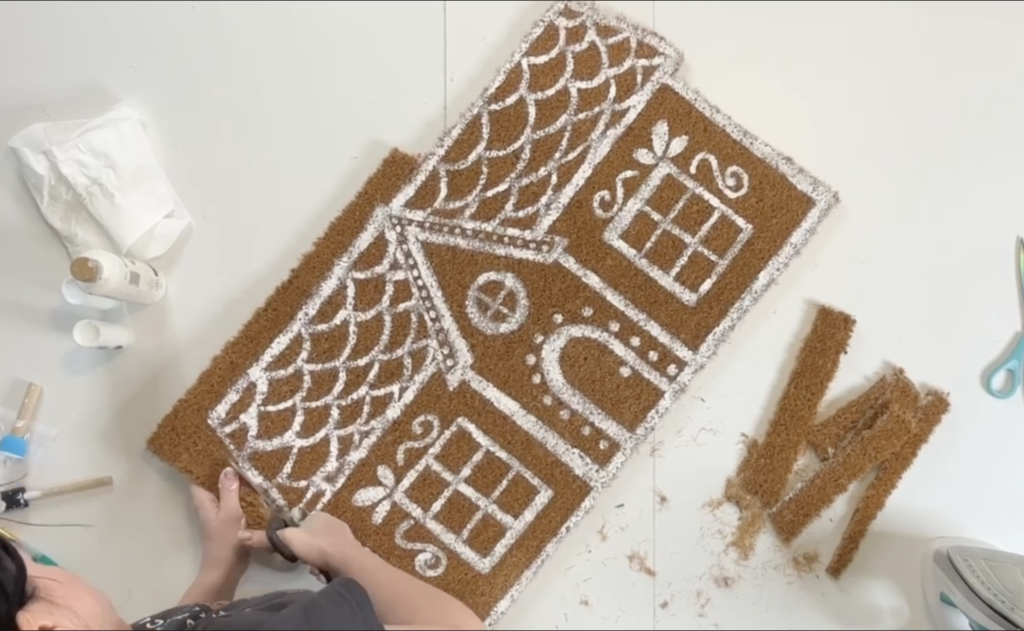
Once the paint is fully dry, you’ll take your scissors and cut around the edge of the house. I did note for you to have Heavy duty scissors for this because it’s really hard to cut with regular scissors. But if you don’t have or don’t want to buy heavy duty scissors, just use a pair you don’t mind completely destroying and get ready for the hand workout of your life. Speaking from personal experience here.
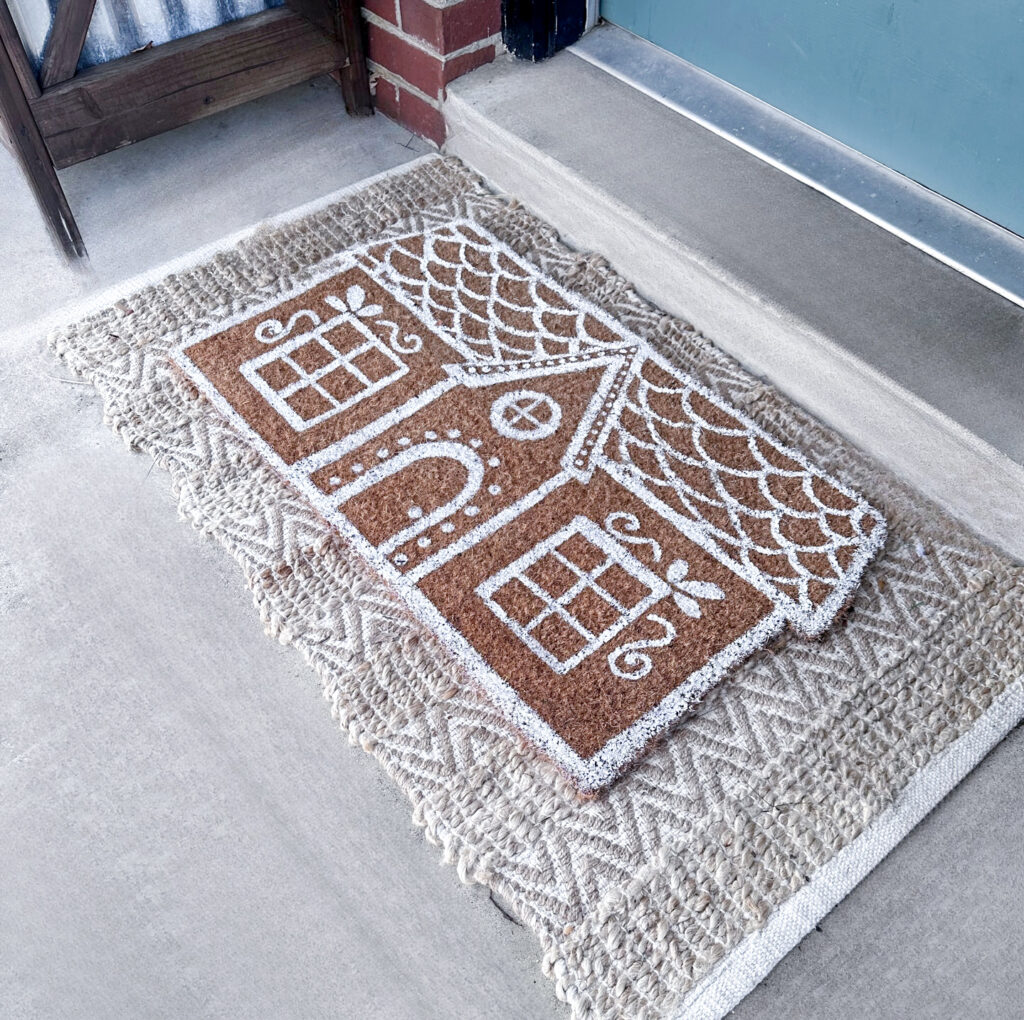
FINISHED!
And now for the grand reveal! I really wasn’t sure what I was getting myself into here. But for my first ever door mat project, I’m so thrilled with how it turned out. I definitely think I’ll try out a different stencil method for my next though, since I did find the freezer paper to be a bit frustrating at times. So just a little tid bit there for you. I’d love to see one of you try my file using a vinyl stencil and let me know how it goes! Just sayin’.
If you haven’t already, be sure and check out my full video tutorial
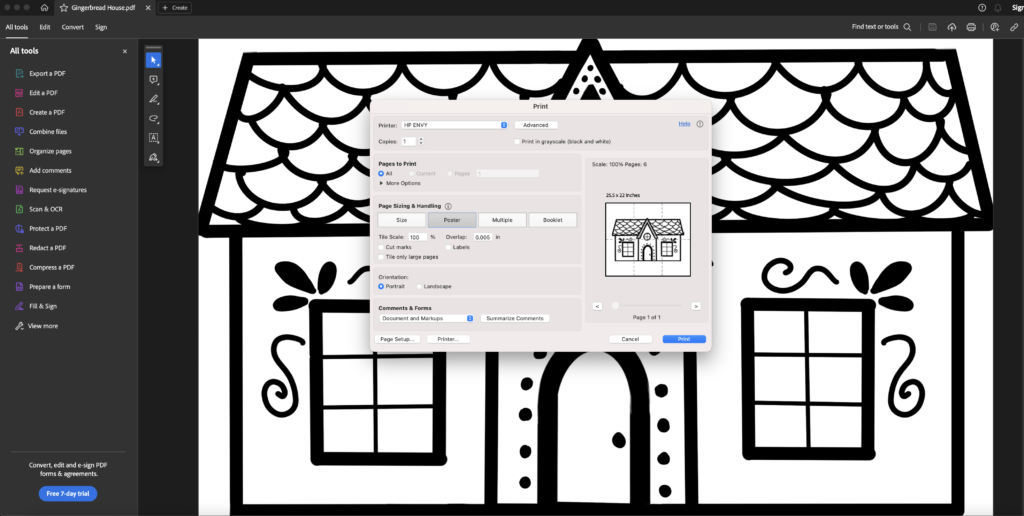
While I would never personally take the time to hand cut this stencil, I wanted to go ahead and just provide an option and some tips for any readers that want the option. I’ve created a PDF file that you can print off and hand cut out your stencil.
To complete this, you’ll still want to have a tacky cutting mat and a really sharp xacto knife. Start by opening up the file in adobe reader. This is a free software and it’s necessary if you want to be able to print off one large image split between multiple pages. When you go to print your image, you’ll need to make sure you select the “Poster” Option and that you print on the non waxy side of the paper.
In order to print this on freezer paper, you will either need to cut your freezer paper pieces down to exact letter size or you’ll need to purchase printable freezer paper found here.