
Overview
Don’t we all love a good wrap dress? Flattering, comfortable, and versatile. Dress it up with a pair of heels, or throw it over your swimsuit with a with some sandals and hit the pool. I created this dress to take on our vacation to Curacao. I searched high and low, but could not find a tutorial or a product available for purchase that fit what I had in mind. So I handled the predicament as I always do, DIY of course!!
This tutorial will walk you through the steps of achieving the tie dye look as well as a few simple cuts to knit fabric. This tutorial was meant to be a no sew, but I did decide to put two simple seams in the skirt portion of the dress, in the end. It’s not a requirement, but I decided that I preferred it sewn. I suggest you make all your cuts, then put the dress on to decide for yourself. If you can’t sew, you could always use some heat bond tape instead.
First I will walk you through my process for the tie dying the fabric. If you do not wish to tie dye, you can skip ahead to STEP 5.
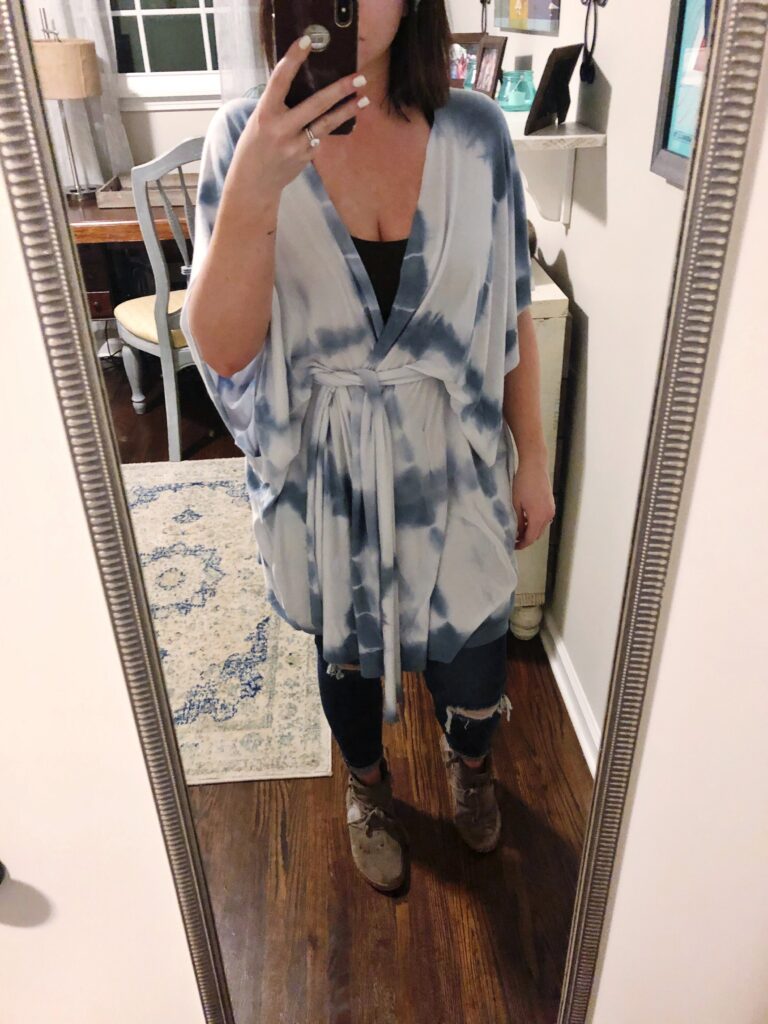
**NOTES REGARDING FABRIC & SIZING – I chose a 4 way stretch rayon knit for this project. Rayon and cotton are best, if you plan to tie dye, as they are natural fibers that will accept the dye. In comparing the two options at the fabric store, I went with the rayon because it was much more flowy than the cotton knit. You can complete this project with any stretch knit fabric, but I do recommend choosing a 4-way stretch option. Sizing is going to be one size fits most, if you follow my measurements. However, read through my details completely and make a judgement call based on my body type and how you perceive the fit in my photos. For reference, I’m 5’4 152 lbs in these photos. If you are similar, you can probably get away with just using my measurements. If you are not, then pay close attention to my measuring decisions before cutting, and keep a soft measuring tape handy to check yourself as you move through the steps, giving you the ability to adjust if necessary. Please take in to account ahead of time, if you are significantly taller, you’ll want to buy more yardage to give some extra length. If this is the case, you’ll want to purchase 1.75 – 2 yards then cut to your desired length after you’ve tried it on.
This post may contain affiliate links. If you purchase from these links, I may receive a few pennies 🙂
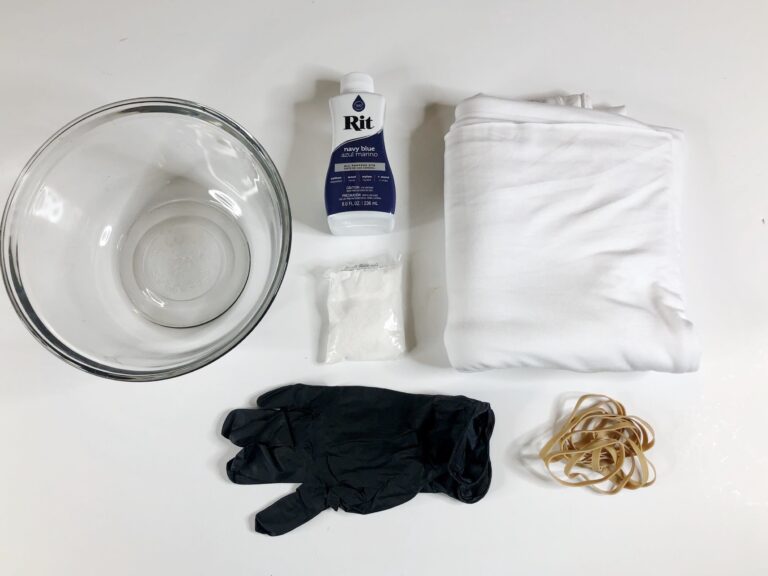
SUPPLIES:
1.5 yards Rayon knit fabric (57” wide)
Gloves
Soda Ash
Fabric Dye ( I used RIT Navy Blue)
Rubber Bands
Large Bowl, Bucket, or Sink
Rotary knife or sharp fabric scissors
Quilting ruler or yardstick
Soft seamstress’s measuring tape
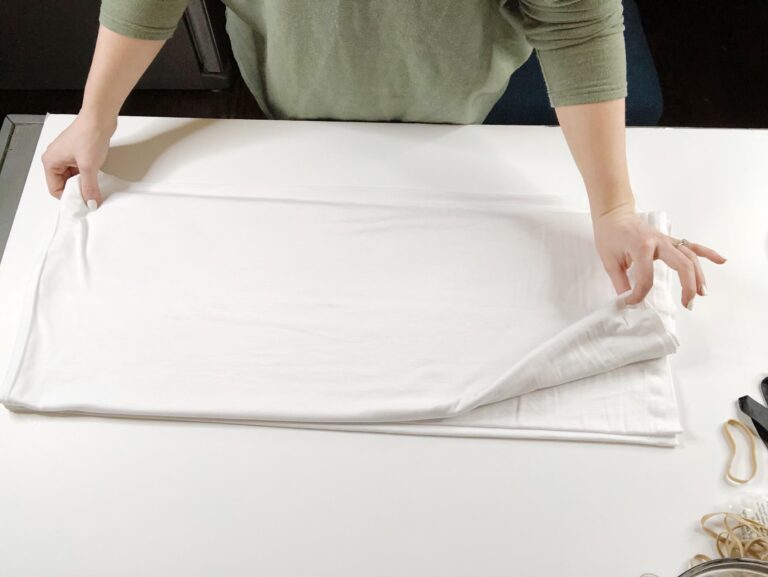
STEP 1:
Neatly fold your fabric down to a manageable size
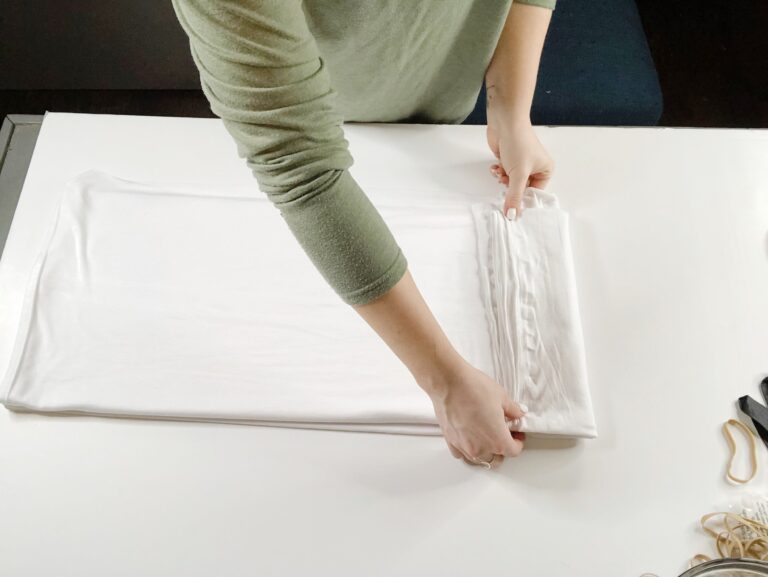
STEP 2:
From there fold back and forth into an accordion style fold. Similar to making paper fans as a kid in school.
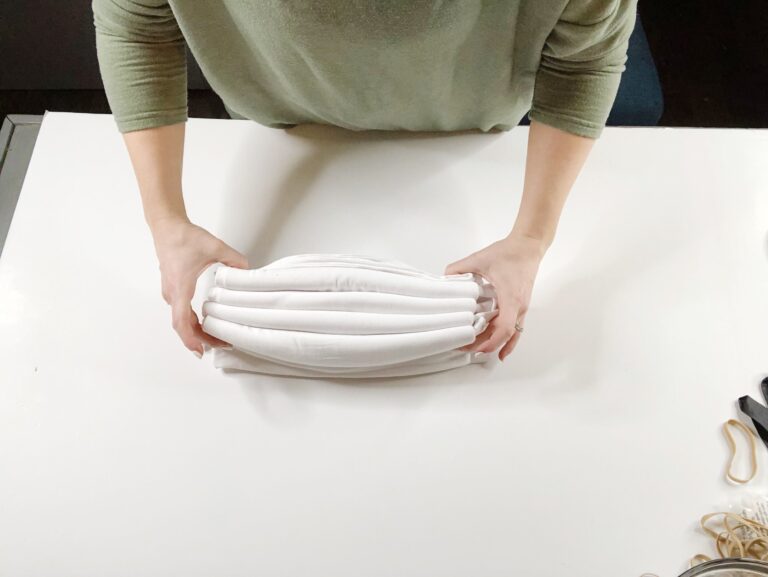
** An Accordion style fold will look like this from the side.

STEP 3:
Secure the fabric with a few rubber bands tied tightly in a caterpillar like fashion. Tying the rubber bands fairly tight.
STEP 4: DYE PROCESS
**This is where my photos for the Tie Dye process end. I had planned to do this in a large bowl, but realized quickly that the bowl I planned to use was not large enough and I didn’t have one any larger. So from here I moved over to the sink, where setting up my tripod was not an option.
- Place your bundled fabric into the plugged sink and fill with hot water just enough to fully submerge the fabric. My tap gets really hot, so I did not feel necessary to boil. But if your water heater is turned down, you should heat some water on the stove.
- Remove fabric from clear/hot water
- add soda ash
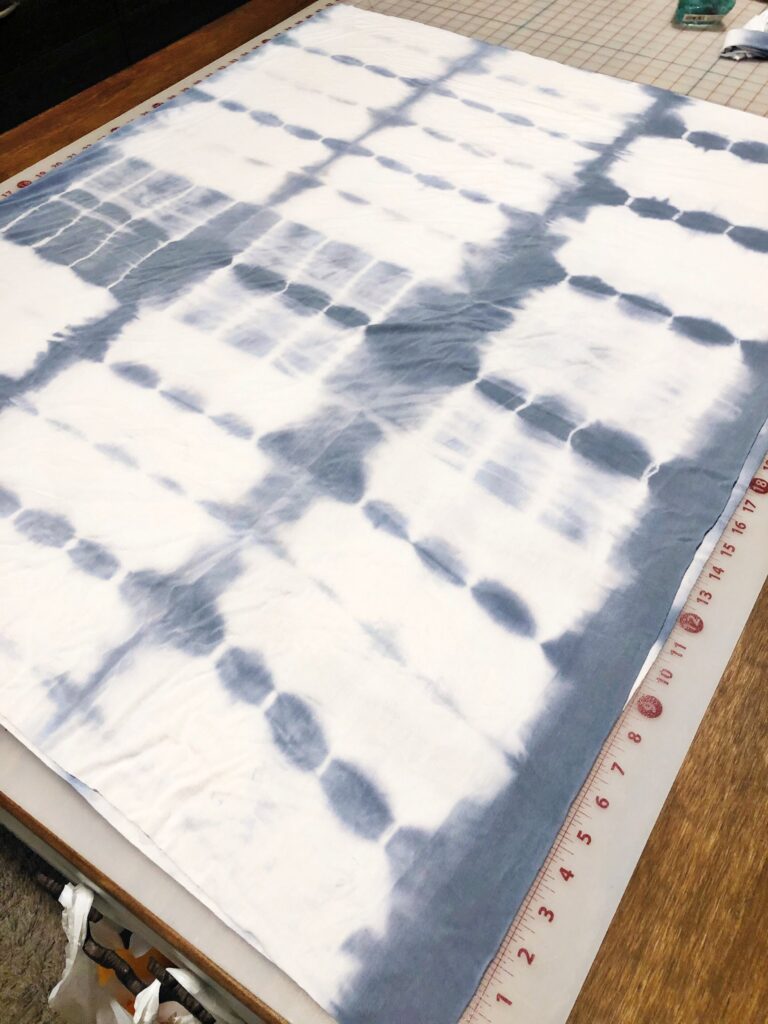
- add dye – I first added about half my bottle, then added the rest as I wasn’t happy with the shade of blue I was getting. I suggest starting with a smaller amount and adding more until you achieve the color you are looking for. The color you get will vary based on the type of fabric you choose to purchase and how long you let it soak. Keep in mind, it will appear lighter once the fabric is dry.
- Once you’ve achieved the color you’d like, let your fabric continue to sit in the dye for a few minutes.
- When finished, being sure to wear gloves, ring out your fabric bundle as best you can, and remove rubber bands.
- Allow to fully air dry outside
- Once dry, run through the wash on a cold normal cycle. I added fabric softener to give my fabric extra flow and drape.
STEP 5:
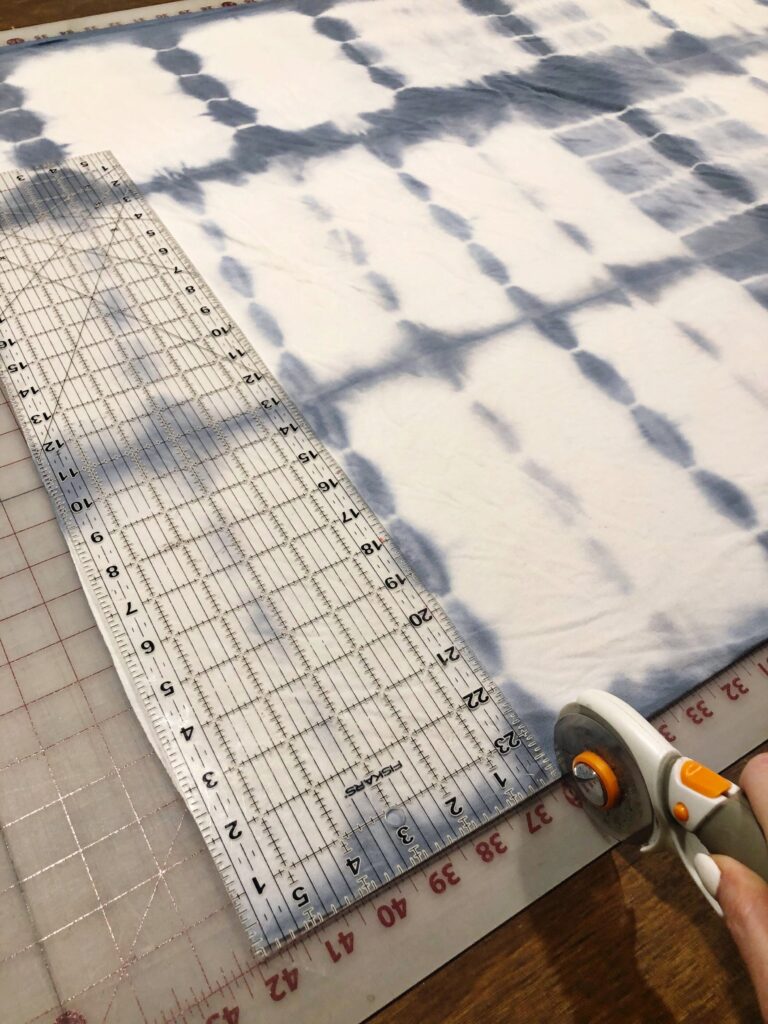
Fold fabric in half. I’m fortunate to have a large cutting table in my studio, making this a bit easier on me. However, if you do not have a cutting mat set up, you’ll just need to spread out on your kitchen table or floor. A yard stick and a pair of sharp scissors will work just fine for measuring and cutting. Folded in half, my fabric was about 57 X 36”. So that’s 57 X 72″ unfolded. And keep in mind, this is post wash and dry, so it has shrunken up a bit. From here, I held my arms out and measure from elbow to elbow, roughly where I wanted my sleeves to hit on each side (36”) and added 6 inches. You will cut this extra 6″ off later to use for the belt (=42”). Then I measured how long I wanted it to be from shoulder to thigh (33”). Next, I cut the fabric down to be 42 X 33”, making sure you cut the length off from the raw edge side of your piece, NOT YOUR FOLD. Think of the fold as your neckline & shoulders when looking at the piece.
STEP 6:
Now go ahead and cut 6 inches off the width of your piece. Again, we are thinking of the fold as your shoulders, so you are cutting along a raw edge, toward the fold, so that it makes one continuous piece that measures 6X66″. This is your belt.
** Using a rotary knife and mat ruler will make this easier to cut nice and clean/straight. However, if you do not have these tools and are using scissors, do not fret over slightly imperfect cuts. This dress is so drapey that small imperfections will not be noticeable.
STEP 7:
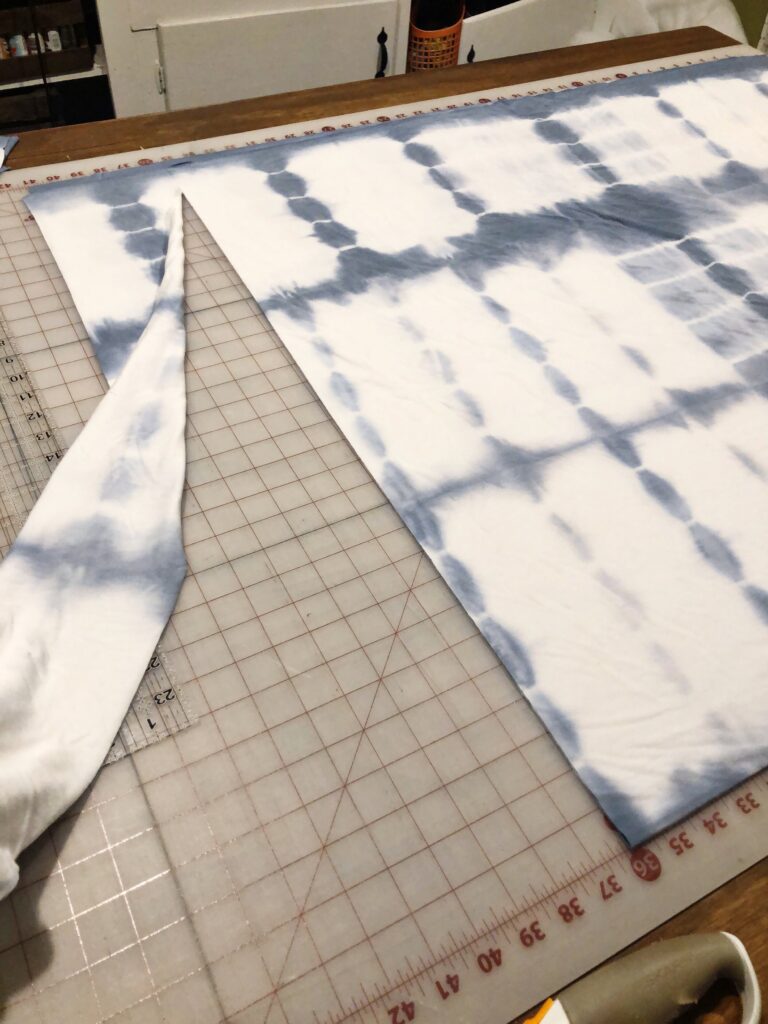
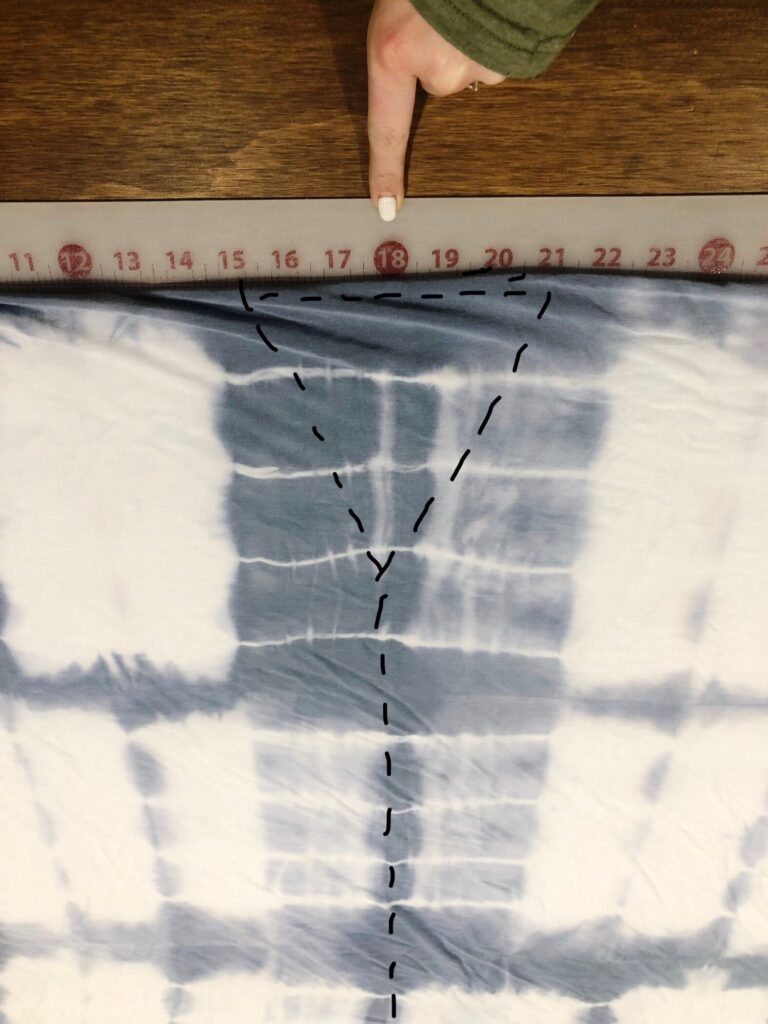
Leaving your fabric laying in the same position, now you need to find the middle. For me, this was 18”. I’ve drawn roughly the cut you need to make for your neckline & front opening. This is very forgiving and does not need to be an exact science. Just be sure you are only cutting the top layer of fabric, and NOT through both layers. From here you’ll need to try and cut straight up the center. Then about 7-8” from the top, you will V off and cut out a triangle. shape for the neckline.
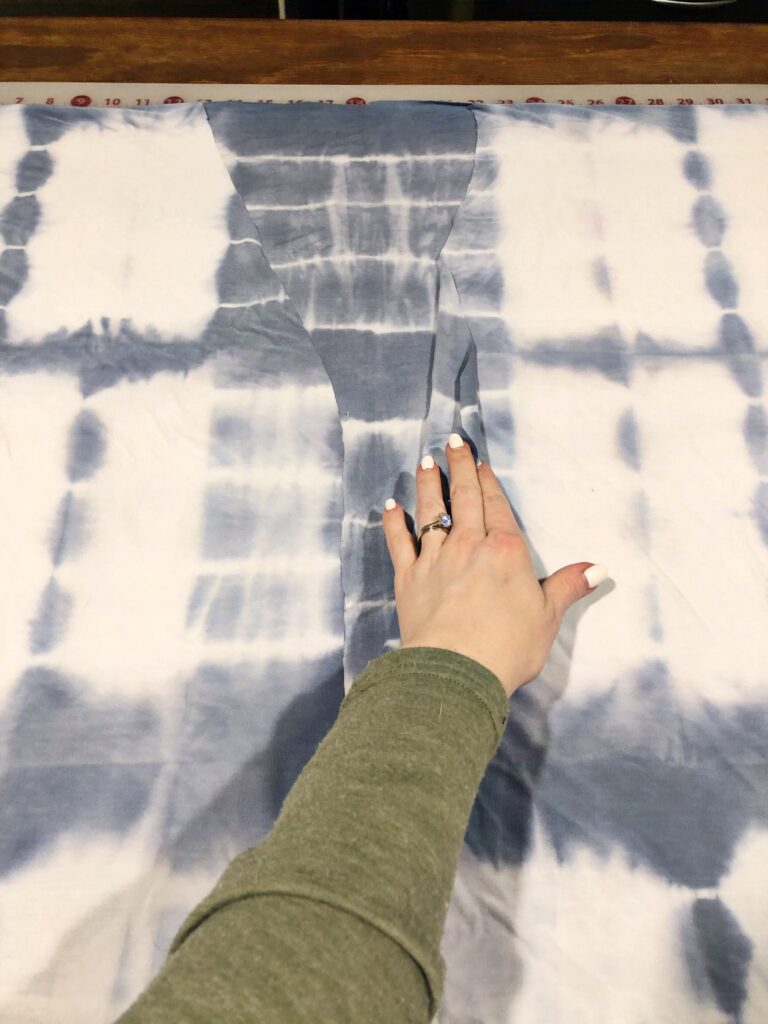
** When you start cutting your V, you’ll want to keep the cut smooth and rounded. Not a sharp turn into the V, that will create a point. At the top of the neckline you will cut straight across on the fold.
STEP 8:
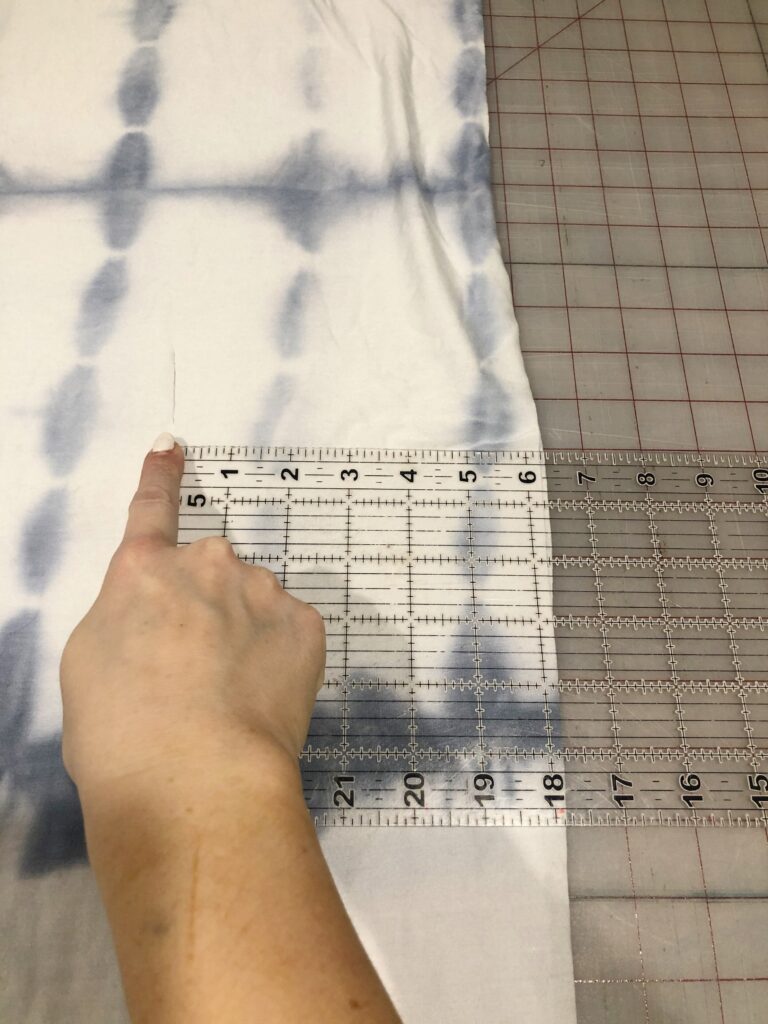
Here, you need to decide where your waistline should be. I measured from the top of my shoulder, to the smallest part of my waist. I found the length from shoulder to waist, then added 2 inches to create some extra slouch. This gave me a measurement of 14” from the shoulder. So that’s 14” down and 6” in from the edge, create a cut/slit through both layers of fabric.
STEP 9:
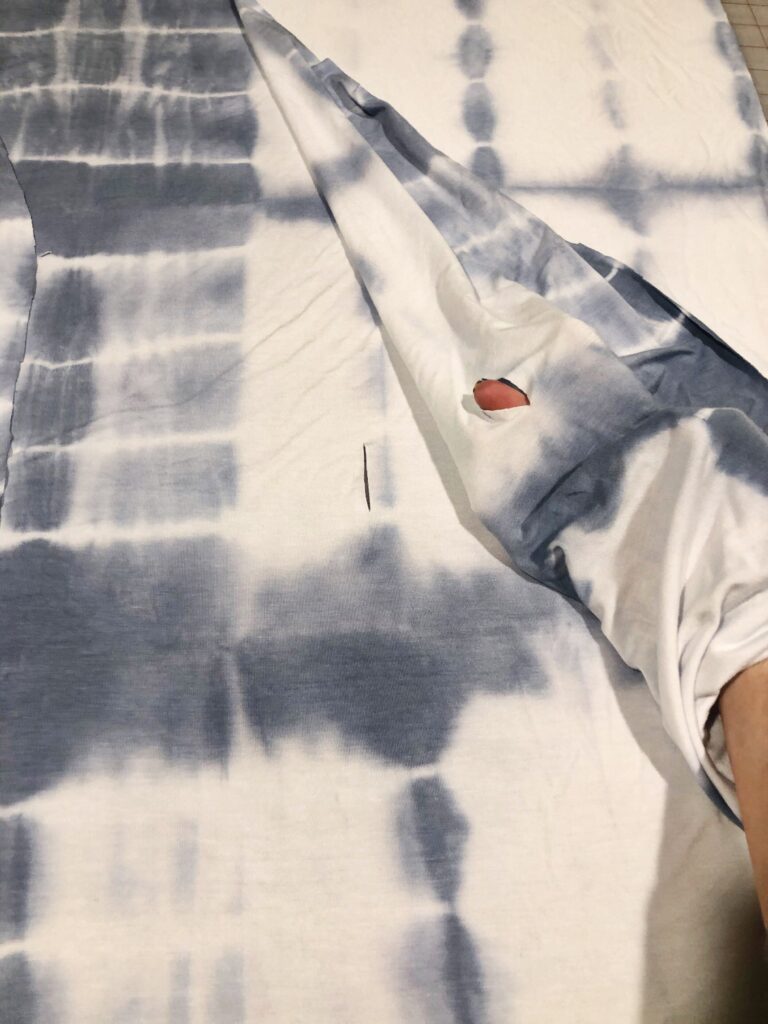
Repeat on the other side. We are creating channel holes that you will thread your belt piece through.
OK! Now go try it on! To thread your belt, you’ll first put the dress over your shoulders. Starting from the back, you’ll feed the belt into the holes, then through under the arms, and back out through the front holes. To clarify, the back and the front of the dress will have the belt exposed on the exterior. The sides, under the arms, it will run inside the dress, forming a batwing/kimono sleeve.
After you have it all tied up how you like. This is when you decide if you need to make any alterations to the length or if you want to sew/close up the sides. I did choose to sew about eight inches up from the bottom on each side. You can definitely leave it loose. I just personally felt it was more flattering, and required less adjustment with both sides attached. If you do sew, don’t forget to use a zig zag stitch for stretch fabric!

CONFESSIONS:
For this project, I didn’t have too many flubs. I did make a mistake in a measurement and cut a belt hole that had to be sewn back up. So I just want to remind you to measure twice, cut once 😉

IN CONCLUSION:
I adore this dress. And the fact that I only spent about 60 seconds putting two small seams in it, makes me love it even more. It’s a beautiful wrap dress, but also works perfectly as a cardigan style kimono, by just removing the belt. It’s an incredibly easy DIY that is super versatile to style. It’s comfy, flattering, and EASY! Ive had this piece in my vacation wardrobe for 3 years now and it’s still a staple. So grab some fabric and get cutting ladies!!